
Connect Cuik inside ChatGPT
Remote connector: setup details, intended workflow and current availability.
Connect ChatGPT to Cuik
The connector makes Cuik tools available in ChatGPT without a local program. It uses the public MCP server and the permissions of your Cuik account.
Follow the illustrated steps below. Click a screenshot to enlarge it. The interactive guide in Cuik is also available under Connecteur → ChatGPT. Some screenshots show the French interface.
Connection settings
| Field | Value |
|---|---|
| Name | Cuik |
| MCP server URL | https://mcp.cuik.io/mcp/server |
| Authentication | OAuth, default settings |
| Description and logo | Optional |
Keep the advanced settings unchanged: no client ID or client secret is required.

Download the Cuik logo as a PNG, or right-click the image to save it.
Steps
In ChatGPT settings, open Security and login and enable Developer mode.
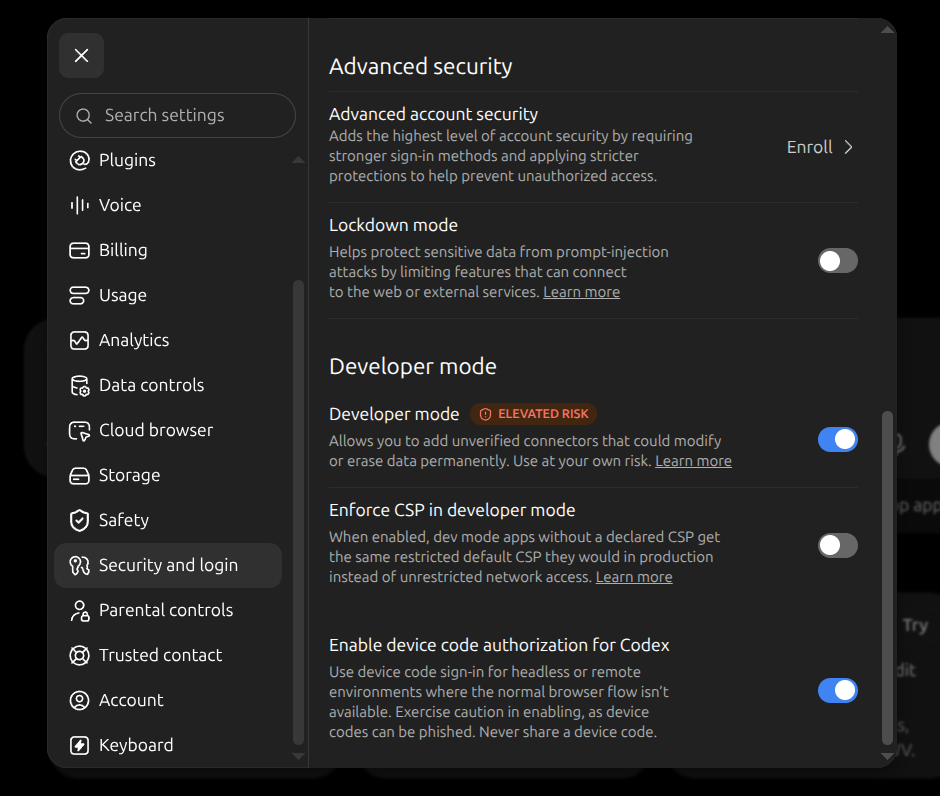 Enable Developer mode under Security and login.
Open Plugins, then + → Create app. If an upload dialog appears, choose Create MCP App; no ZIP file is needed.
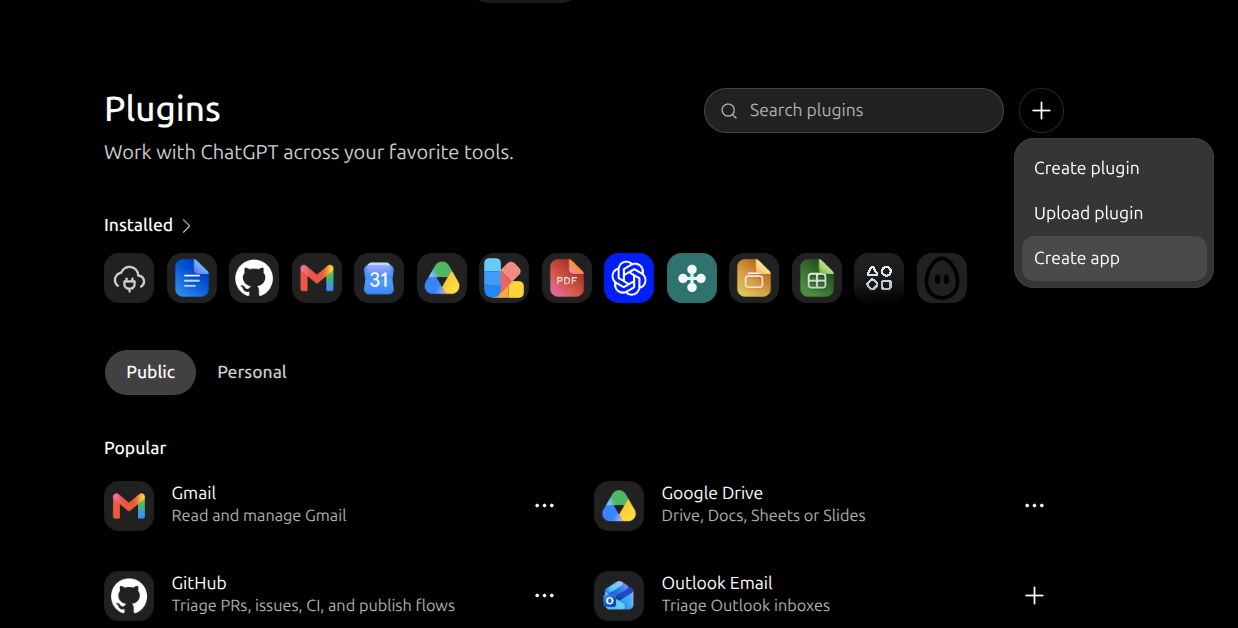 Use the + button to create an app.
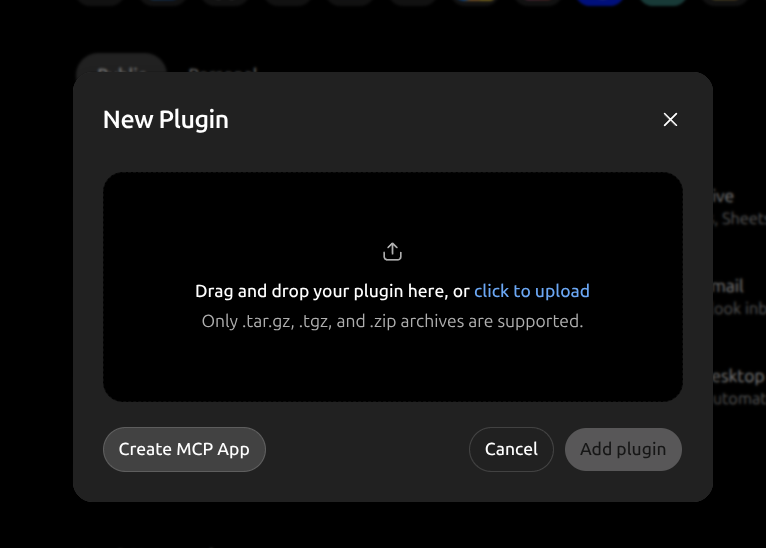 Choose Create MCP App if this dialog appears.
Enter the name and URL above, keep OAuth selected, then read and accept the displayed terms before creating the connector.
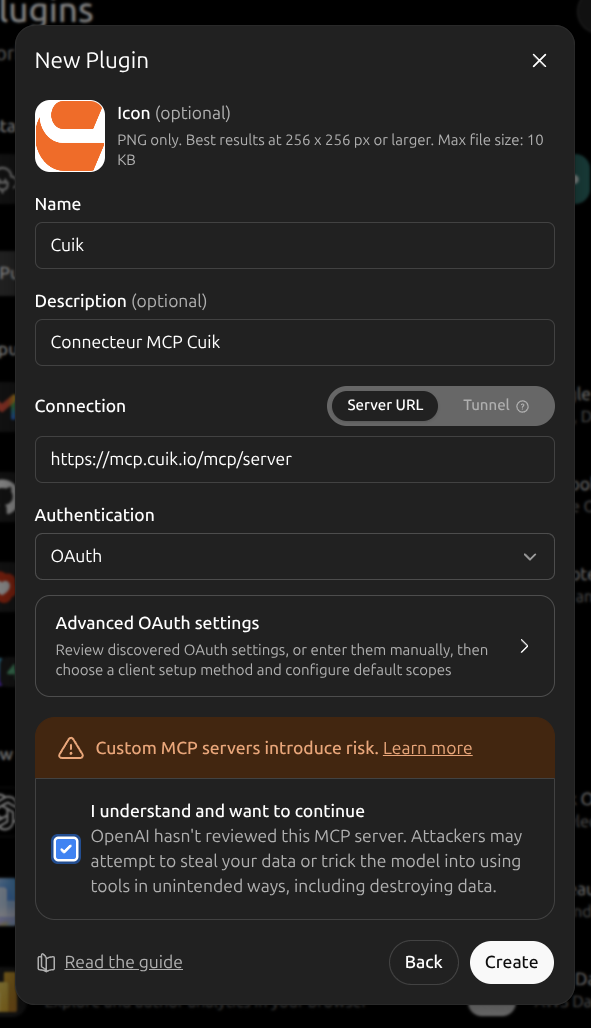 Name: Cuik. URL: https://mcp.cuik.io/mcp/server. Authentication: OAuth.
Click Sign in with Cuik. In the Cuik authorization form, paste your API key from Cuik → Settings → API, then authorize the connection. Do not paste this key into a chat message.
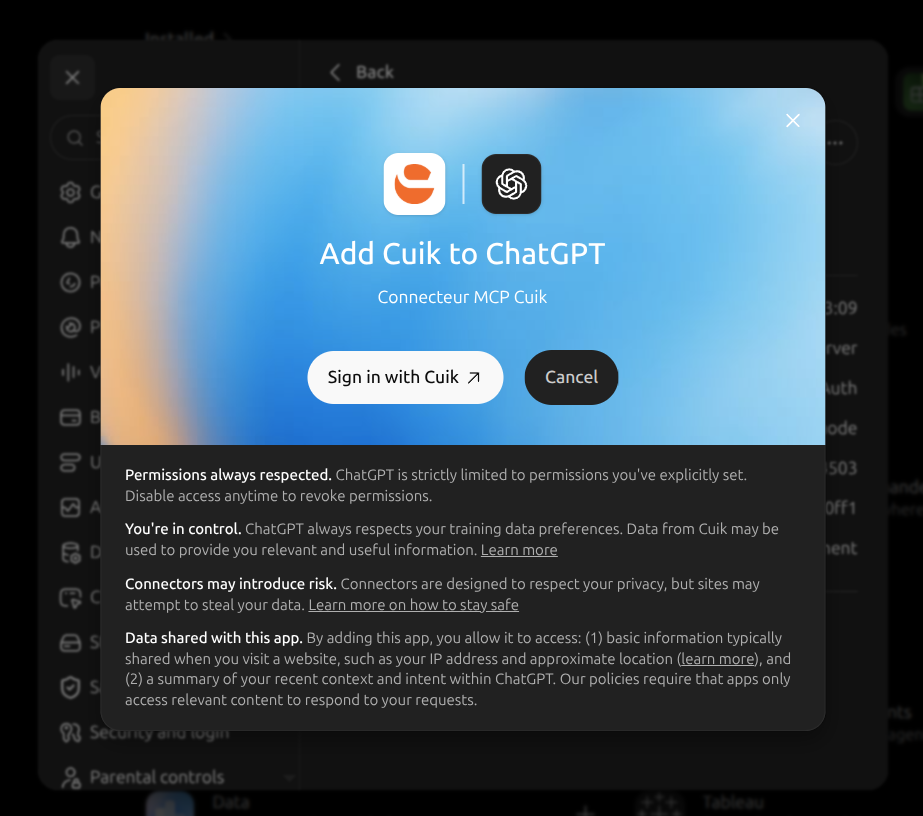 Select Sign in with Cuik to open the authorization page.
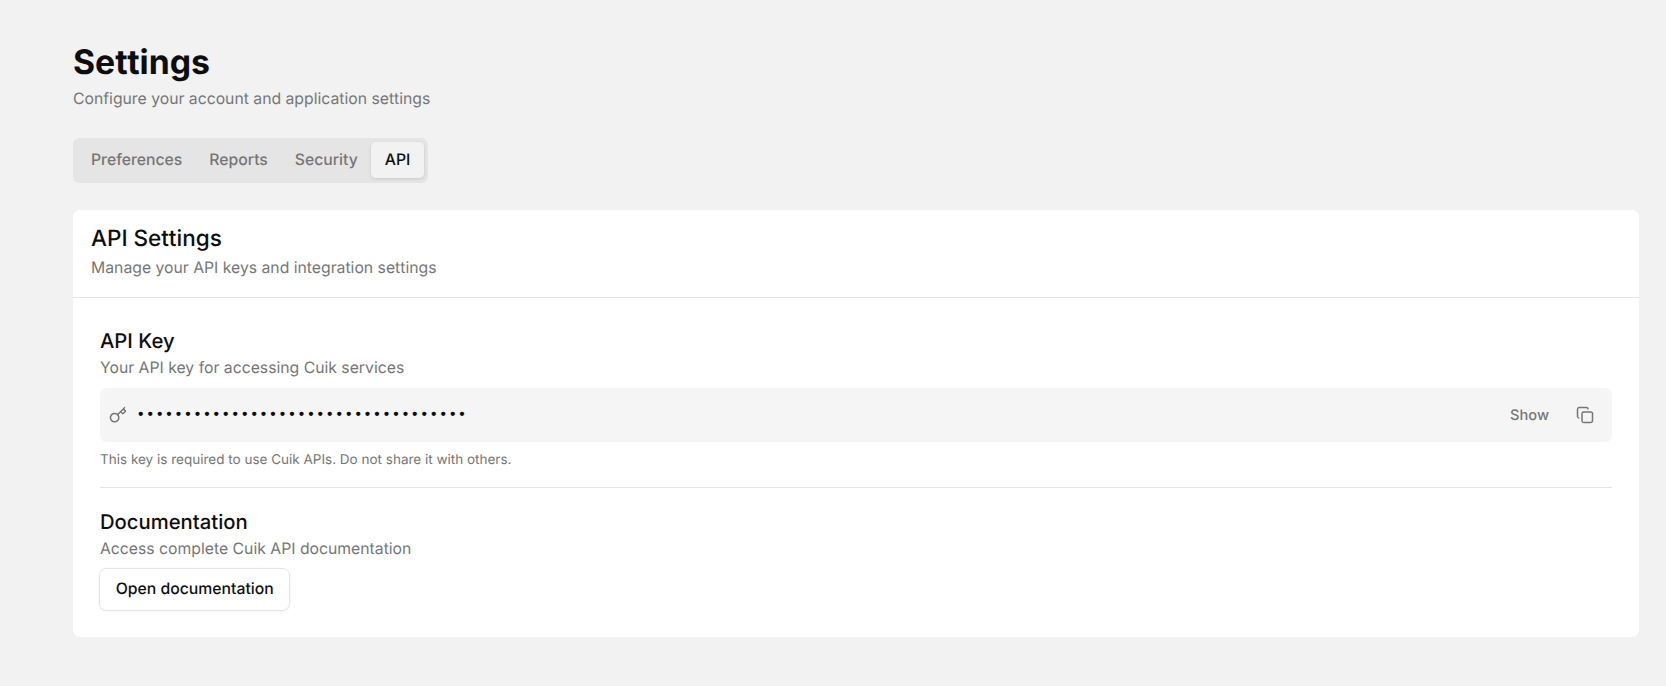 Copy your key under Settings → API. The key in this screenshot is masked.
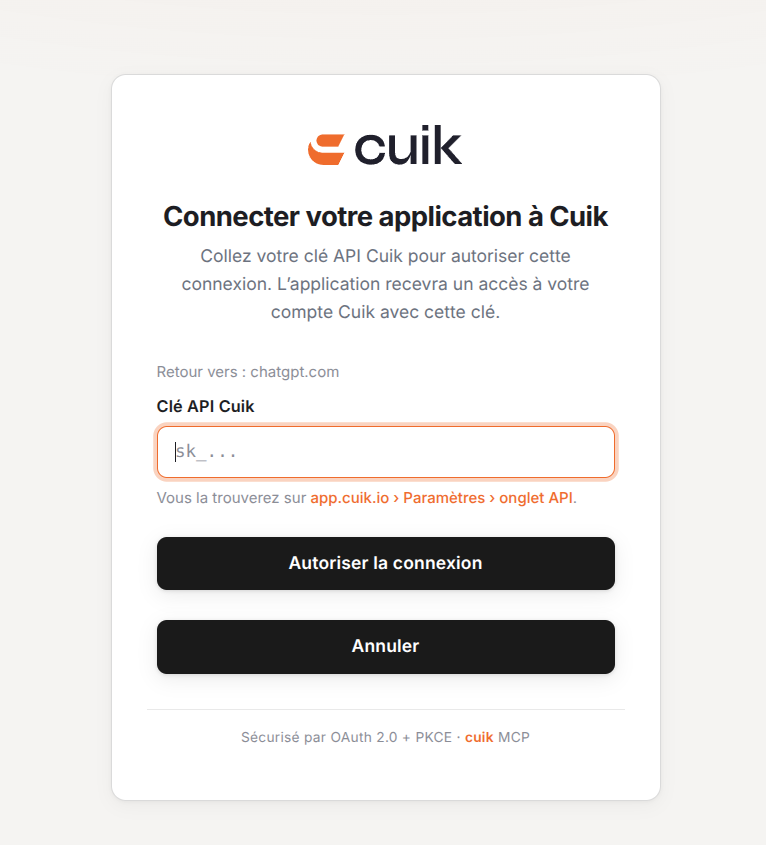 Paste your key into this Cuik form, then authorize the connection.
Open a new conversation and enable Cuik among the apps or tools.
To reduce confirmation prompts, open Plugins → Cuik → Permissions and select Allow all tools. This covers reads and the create, update or delete actions available to your Cuik account. This choice is optional; you can keep the default permissions. Labels and developer-mode availability depend on the current UI, account and workspace policies. Official OpenAI guide.
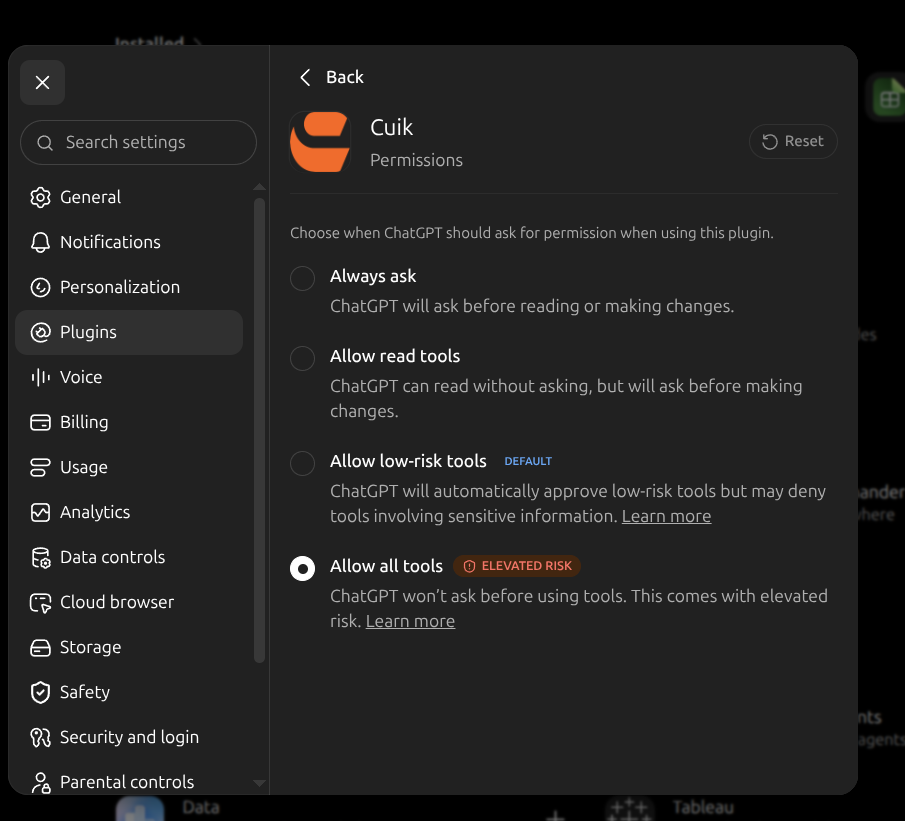 Manage permissions in the Cuik connector settings.
Check the connection
With Cuik, list my projects without changing anything.Check that ChatGPT calls a Cuik tool and returns your actual projects. A generic answer without a tool call does not confirm the connection.
- Empty tool list: select Refresh in the Cuik app settings and open a new conversation.
- Developer mode missing: check your account features or ask your workspace administrator.
- 401 / 403: check your API key and Cuik account access.
- Incorrect address: use the complete URL ending in /mcp/server.
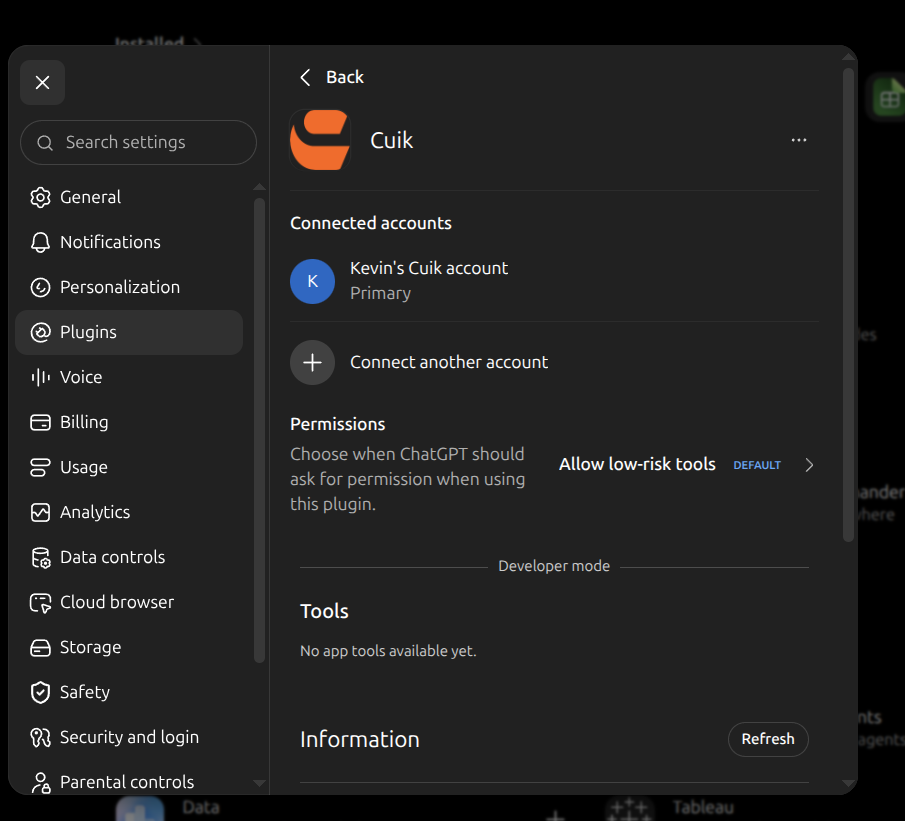 If the tool list is empty, select Refresh.
For Claude, select Connecteur → Claude in the same guide. For Codex or Claude Code, see MCP installation.